
Pier and Beam Drainage Problems: Signs Water Is Affecting Your Home
Last updated: September 10, 2026
Key Takeaways
- Walk the perimeter after a normal rain, not a storm event, and again after 24 hours.
- A problem is mud, silt, or visible ponding, especially if it lingers longer than 24 to 48 hours.
- Walk the lot within 12 to 24 hours of rainfall and trace where water runs, ponds, or cuts channels.
- If a door has been sticky for 15 years, that is different from a door that began sticking this season after a wet winter.
Damp soil under the house. Musty air. Soft floors. Doors that won’t close cleanly. Those are the usual warning signs in pier and beam drainage problems, and they show up before the damage feels dramatic. Under a raised house, the real question is not whether water is nearby; it is whether that water has started lingering where it shouldn’t, around or beneath the crawl space, long enough to affect framing, the subfloor, and soil support.
Who this applies to, and what it assumes you already know
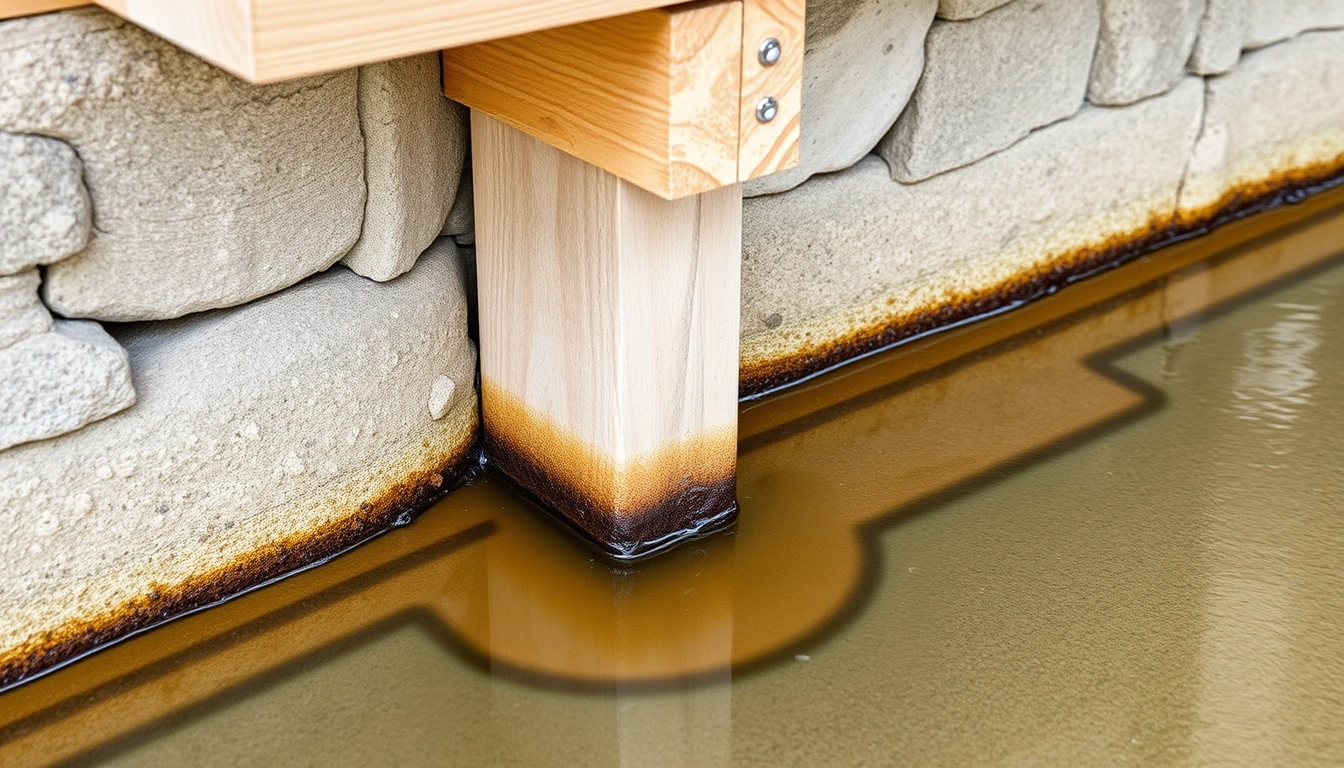
This is for homeowners with a pier and beam foundation, a crawl space, or any raised floor system built on posts, concrete piers, or masonry blocks. I’m assuming you already know the basics: your house is not on a slab, there’s open space below the floor, and the drainage around the site matters. And I’m also assuming you can safely check the exterior grade, inspect vents or access points, and notice changes inside the house without crawling into unsafe mud or standing water.
Not the right fit for a home with active flooding, sewage backup, or a floor that feels dangerously unstable. Those are not “watch and wait” situations. If water is getting into the structure faster than it can leave, or if a beam, joist, or pier looks crushed, shifted, or heavily decayed, stop using the area and get qualified help. In a foundation context, a home inspector, structural engineer, or experienced foundation contractor can sort out nuisance moisture from structural movement. Easy to say, harder to ignore.
The signs I care about most are quiet ones. A door starts rubbing at the top corner. Floorboards feel springier than they used to. A corner of the house smells damp after rain. Or the crawl space stays wet 24 to 48 hours after a storm. That’s the trail, not the headline, in pier and beam drainage problems.
A generic article usually gets this wrong by treating every damp crawl space the same, so it helps to compare the pattern with local conditions and, if the issue is unclear, consult a foundation professional. It’s not the same. A house on clay soil, a house downhill from a neighbor’s yard, and a house with a clogged perimeter drain each fail differently. The first job is to spot the pattern, not guess at a cure; if you can’t tell whether it is runoff, groundwater, or plumbing, bring in a qualified inspector.
What water does to a pier and beam house
Water affects a pier and beam home in three main ways: it softens support soil, it keeps wood wet long enough to decay, and it drives moisture into the crawl space until the underside of the house stays humid. “Crawl space humidity” means the air below the floor has enough moisture to keep wood above a safe dry range. In plain terms, that means no fresh air circulation, no drying after rain, and a steady earthy smell.
The support soil matters because piers are only as stable as what they sit on. If drainage lets water pool around a pier, the soil can lose bearing strength. You may not see a pier sink all at once. More often, one side of the house settles a little, and then the dominoes start: one beam drops, a few floor joists twist, interior finishes crack, and doors drift out of square. On expansive clay, the cycle can be worse because wet soil swells and dry soil shrinks.
Wood takes the hit too. Subfloor panels, joists, sill plates, and beam ends are vulnerable if they stay damp. Often the damage stays hidden until a screwdriver or awl sinks too easily into the wood, especially near the exterior edge or around plumbing penetrations. A musty smell alone does not prove rot, but a musty smell plus discoloration, mold growth, or spongy wood is a real warning in pier and beam drainage problems.
One detail people miss: water does not have to flood the crawl space to cause trouble. Repeated wetting from runoff, splashback from gutters, or a landscape slope that sends sheet flow toward the house can do it quietly. A home can stay “mostly dry” and still carry enough recurring moisture to damage insulation, reduce airflow, and weaken framing over time. Sneaky stuff.
How do I know water is affecting my foundation?

Water is affecting the foundation when the pattern repeats after rain, the crawl space stays wet longer than it should, and the house starts showing movement or moisture symptoms together. One symptom can be a coincidence. Three or four together usually are not in pier and beam drainage problems.
Start outside. Walk the perimeter after a normal rain, not a storm event, and again after 24 hours. Look for downspouts dumping at the foundation, soil that slopes toward the house, puddles that linger, mulch packed against vent openings, and roof runoff cutting channels in the yard. A good basic target is simple: the soil should fall away from the house, not toward it, and water from downspouts should be carried well away from the footing line. According to the U.S. Department of Housing and Urban Development, finished grade should slope away from the foundation, typically about 6 inches in the first 10 feet when site conditions allow.
Then check inside. Look for doors or cabinets that stick seasonally, drywall cracks that reappear after rain, floor dips that are new or worsening, and a gap that changes between baseboard and floor. In a pier and beam house, movement often shows up first in finish details because the structure has a little flexibility. A crack by itself is not proof of drainage trouble. A crack plus a damp crawl space, soft soil at a pier, or visible runoff paths outside means a lot more.
Next, inspect the crawl space or access opening if it is safe to do so. You’re looking for standing water, wet insulation, water stains on piers, rust on metal hardware, fungus on wood, and heavy condensation on pipes or ductwork. If the ground is bare, it should not look muddy after a normal dry spell. If vapor barriers are present, they should not be floating, torn, or covered in silt.
A useful rule of thumb: if the crawl space remains visibly damp more than a day after rain, or if odors are strongest after wet weather, drainage deserves attention before cosmetic repairs. Paint and patch work won’t fix a wet support system.
How I would inspect a pier and beam drainage problem, step by step
I’d inspect it in this order because it separates site drainage problems from structural damage and keeps you from fixing the wrong thing first.
- Map the water path after rain. Walk the lot within 12 to 24 hours of rainfall and trace where water runs, ponds, or cuts channels. Verify the slope moves away from the house and that no downspout empties within a few feet of the footing line. A problem is any place where runoff consistently points back toward the crawl space.
- Check gutters and downspouts. Look for overflow marks, loose elbows, clogged outlets, and short discharge points. Verify that water exits cleanly and is carried away by extension or drain line. A problem is staining under gutters, splash marks on siding, or erosion under a downspout.
- Measure ground clearance and ventilation openings. Confirm that vents are not blocked by soil, mulch, or stored material, and that there is enough clearance for air movement under the house. A problem is vents buried by grading or closed off by debris, which traps moisture and slows drying.
- Inspect piers, beam ends, and joists. Use a bright light and look for dark staining, mold, cracked masonry, rusted hardware, or wood that appears swollen or soft. Verify whether the damage is localized or repeated at multiple supports. A problem is deterioration at more than one pier, which suggests a site moisture issue rather than a single plumbing leak.
- Check the crawl space floor condition. Look at bare soil or the vapor barrier. Verify whether the ground is dry, only damp, or muddy, and whether water stains show a recent flood line. A problem is mud, silt, or visible ponding, especially if it lingers longer than 24 to 48 hours.
- Document floor movement inside. Walk slowly across rooms and note dips, bounce, squeaks, or sloping. Use a marble, laser level, or simple ball test only as a rough clue, not a diagnosis. A problem is movement that has worsened over a few months or changes after heavy rain.
- Separate plumbing from drainage. Look under sinks, around tubs, near water heaters, and at supply lines and drain traps. Verify whether moisture lines up with fixtures or with rain events. A problem is wetness that appears even in dry weather, which points more toward plumbing than grading.
- Decide whether the issue is local or systemic. Compare one damp corner to the whole perimeter. Verify whether only one low spot collects water or whether the entire site stays wet. A problem across multiple sides of the house means the fix is usually broader than one patched gutter or one truckload of fill.
The order matters because people often jump straight to interior repairs. Backward move. If the ground outside is funneling water toward the house, the floor can be releveled and still shift again.
What usually goes wrong, and what it costs
A dehumidifier is the mistake I see most often. It can reduce crawl space humidity, but it does nothing for standing water, saturated soil, or runoff hitting the foundation. The result is delayed rot, wasted electricity, and a problem that keeps coming back. Better move: fix the exterior water path first, then manage humidity if needed, and follow the moisture guidance in crawl space humidity control.
Another common error is piling soil, mulch, or landscaping rock against the house to “direct water away.” That can bury vents, hold moisture against framing, and create a fake slope that hides drainage failures. Keep the grade away from the house without covering access points or trapping water at the sill area.
Sealing only the inside is another trap. Caulking floor cracks or painting over stains may make the room look better, but it does not stop wet soil or a bad gutter discharge. The cost is cosmetic delay while decay continues out of sight. The better approach is to correct runoff, then repair interior finishes after the structure dries, as described in foundation repair basics.
Then there’s the single low pier that gets ignored because the rest of the house “feels fine.” One failing support can distort nearby framing and load paths. The cost is uneven settling that gets harder and more expensive to correct later. The better alternative is to verify whether the movement is isolated or part of a broader drainage pattern, then compare that with how to inspect a crawl space.
Overdrilling into the crawl space or installing drains without knowing where the water will go is the last big mistake. A poorly planned drain can move water from one trouble spot to another. If water can’t discharge to daylight or a proper outlet, the project can turn into a wet trench instead of a solution, which is why drainage plans should be checked against yard grading and runoff.
When should I stop guessing and get qualified help?
Stop guessing when the signs shift from moisture to structure, or when the water issue is beyond a simple runoff fix. These are the moments when the wrong DIY move can make the house harder to repair.
Standing water remains in the crawl space more than 48 hours after rain: this means the site is not draining on its own — contact a foundation or drainage professional before adding fill, fans, or sealants.
One or more piers look shifted, tilted, or cracked: this suggests loss of support, not just dampness — have the foundation evaluated before you try to jack or shim anything.
Floor sag, bounce, or slope has gotten worse over a few months: this means movement may be active — stop patching interior finishes and get an inspection focused on support conditions.
Wood feels soft, crumbles, or shows fungal growth: this indicates rot risk, and possibly structural decay — get a qualified assessment, because damaged members may need repair or replacement.
You smell sewage, see discharge, or suspect a broken drain line: this is not a drainage-only issue — stop work and get the plumbing side checked first, since waste water changes the hazard level.
The yard floods from multiple directions or the lot is on a severe slope: this means the drainage problem is site-wide — simple gutter extensions will not be enough, and a broader drainage plan is needed, often reviewed alongside guidance from the EPA on stormwater runoff.
If the house is visibly moving, if there is live electrical equipment in standing water, or if access under the house is unsafe, that is not a normal maintenance problem. That is the point where a qualified pro is the right next step.
What changes in clay soil, high water tables, and older houses
Standard guidance needs to change when the soil and the house fight back. Clay soil is the big one. Clay expands when wet and shrinks when dry, so even “fixed” drainage can still leave seasonal movement. In that setting, I would watch consistent moisture management around the perimeter more closely and trust one-time cosmetic fixes less. A shallow patch of fill may not hold shape long enough to matter.
High water tables change the picture too. If groundwater sits close to the surface, the crawl space can stay damp even with decent grading. That means the problem may not be one bad downspout but the site itself. In those cases, the cure often needs subsoil drainage, not just surface rerouting, and a foundation or drainage professional should confirm the plan before anyone installs it. Harder job than it sounds. Easy to misread after just one rain.
Older pier and beam houses have their own quirks. Original framing may not be perfectly level, and some floor movement may be long-established. The job is to tell old character from active change. I’d compare present conditions against how the house behaves after storms, not against a fantasy of perfect flatness. If a door has been sticky for 15 years, that is different from a door that began sticking this season after a wet winter.
One more edge case: homes with previous encapsulation, added insulation, or a vapor barrier can hide water longer. A clean-looking crawl space may still have trapped moisture beneath the barrier or behind insulation. If the smell, humidity, or movement does not match what you see at first glance, keep digging into the drainage history instead of trusting the surface. Surface calm. Hidden mess.
How do I tell normal moisture from a real drainage failure?
Normal moisture dries out; drainage failure stays, returns, or leaves a pattern. That’s the shortest way I know to separate nuisance humidity from a problem worth fixing in pier and beam drainage problems.
A normal crawl space might feel damp for a short time after rain, but it should not keep the same wet soil, musty smell, or discoloration every time the weather turns. If the wood and framing dry between storms, the issue may be limited. If the crawl space keeps showing the same wet footprint, the same odor, or the same stained areas, drainage is likely involved.
A real drainage failure usually repeats in the same places: under the same downspout, along the same low edge, beside the same pier, or in the same room above the crawl space. That repetition matters more than one wet day. It’s the pattern that tells you the water is being routed poorly, not just that a storm was strong.
The final test is simple enough to repeat after the next rain. Look outside, then inside, then compare. If the exterior runoff, the crawl space moisture, and the interior movement line up, you are probably past the point where a fan or a patch will help. That is when a drainage fix earns its cost.